So, now I’ve got the cellar all framed up with walls and a ceiling. And I’m excited to start cramming insulation in every little nook and cranny to keep this place nice and chill. But there’s one more critical step that absolutely NEEDS to be addressed first… installing the vapor barrier.
So, what’s a vapor barrier and why do you need to put one in your wine cellar? Put simply, a vapor barrier is a layer of plastic that prevents moisture from going through walls. You need to install one whenever you have a wall with different temperatures on each side of the wall… usually the outside walls of your So, house.
The vapor barrier is critical because water vapor naturally moves from rooms with warmer air temperatures to rooms with cooler air temperatures. You’re wine cellar is going to be cooler than the rest of your house, acting like a giant moisture magnet. If you don’t have an effective barrier to stop it, you’re going to end up with a soaking wet wine cellar full of mold. Not “ideal”.
So, first let’s talk about what materials you need for a vapor barrier and then we’ll discuss exactly where it needs to go.
Materials
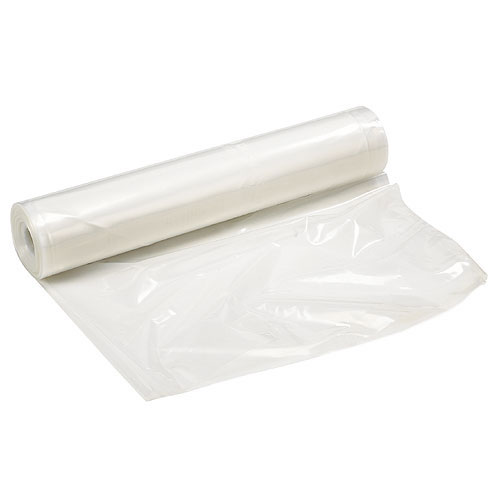
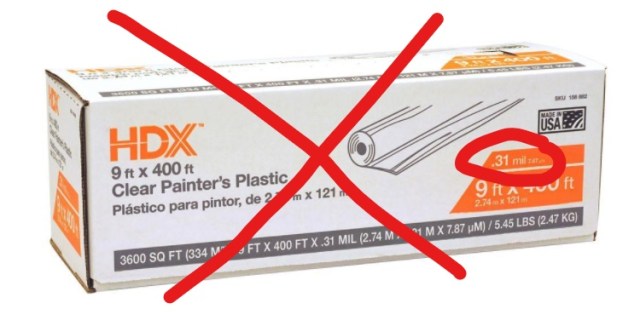
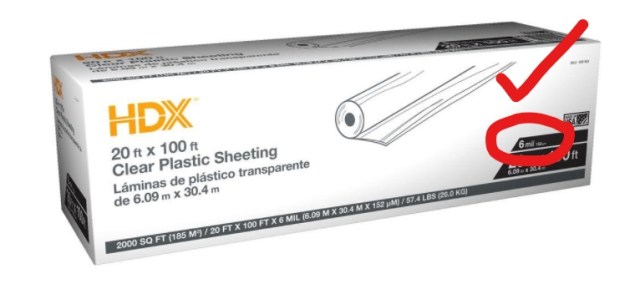
When you go to buy vapor barrier, you’ll find it in large rolls, usually in a box or bag. Below are a couple of images of the Home Depot brand specifically, but I can’t imagine the brand or source makes much difference. What DOES matter is the thickness. You need to get something at least 6mil thick in order to be an effective vapor barrier. Do not accidentally buy the “Painter’s Plastic” which is only 0.31mil.
I used a standard staple gun to attach the barrier to the wood studs. Nothing fancy here.

You’ll also need tape to seal the seams between the sheets of plastic. Logically enough, they call this Seaming Tape. Make sure you get Seaming Tape! Don’t use duct tape, packing tape, painters tape, or any other kind of tape! Those other kinds of tape are not designed to deal with moisture and will very quickly peel off the plastic vapor barrier once it starts to get a little bit wet.

Installation
Once you have your materials, you need to figure out WHERE to put the barrier. Seems simple, but this can actually be quite confusing. YOU NEED TO PUT THE BARRIER ON THE WARM SIDE OF THE WALL. (Warmer air holds more moisture than colder air, so you need to stop the water on the warm side of the wall. If you put the vapor barrier on the cold side of the wall, you will end up trapping all of the moisture IN the wall, which is a very bad thing!)
Here’s a diagram of where the vapor barrier went in my cellar.
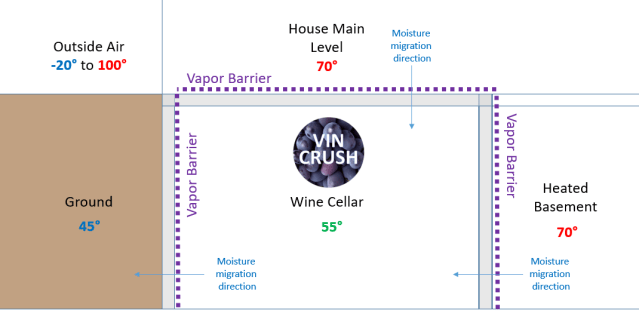
On the walls facing the interior of the house, the barrier is on the OUTSIDE of the cellar wall because the inside of my house is warmer than the cellar. On the underground wall, the barrier is on the INSIDE of the cellar wall because the cellar will usually be warmer than the dirt. (This underground wall is a bit tricky… At 8 feet deep, the ground is almost always 45 degrees. Up at the top, say 1 foot deep, the temperature is going to vary by the time of year. But in general, I decided the dirt would be colder than the cellar so the vapor barrier should be inside.)
Depending on where you live and where your cellar is located in your house, this might be different for you than it is for me.
Here’s a pic of the in-progress of vapor barrier and seaming tape work.

Next time…. using acoustic caulk to seal the vapor barrier to the floor.
Click here to see all posts on building a passively cooled wine cellar.
